How to Clean Camera Lenses Safely: What Photographers Actually Use
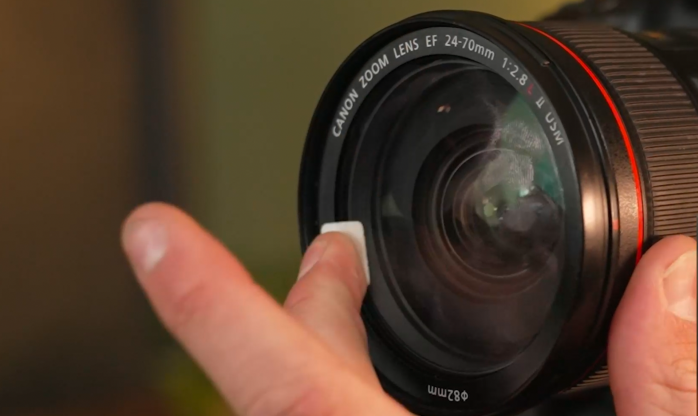
If you have ever reached into your bag and pulled out a lens covered in fingerprints, smudges, or fine dust, you know the mild panic that follows. Knowing how to clean camera lenses safely is one of the most important — and most misunderstood — skills in photography. Use the wrong cloth, the wrong motion, or the wrong solution, and you can permanently damage coatings that took optical engineers years to perfect. Use the right technique, and your glass stays pristine for decades.
This guide covers everything: lens coating science, the actual risks of common cleaning mistakes, the correct dry-wipe versus wet-clean workflow, and storage habits that cut how often you need to clean in the first place. No guesswork, no myths — just what experienced photographers and optical technicians actually do.
Understanding Lens Coatings: Why Getting This Wrong Is Expensive
Before touching a lens with anything, it helps to understand what you are actually cleaning. Modern camera lenses are not just polished glass — they are covered in multiple ultra-thin optical coatings that control how light behaves as it passes through the element.
The most common coating types include:
- Anti-reflective (AR) coatings — reduce flare and ghosting by preventing light from bouncing off glass surfaces. These are typically the outermost layer and the most vulnerable.
- Fluorine or hydrophobic coatings — found on the front element of most modern lenses, these repel water and oils, making fingerprints easier to remove. Canon, Nikon, Sony, and Fujifilm all use proprietary versions.
- Multi-coat (MC) layers — stacked interference coatings that correct color rendition and contrast. Damaging even one layer alters how the lens renders images.
Here is the critical point: coatings are measured in nanometers thick. A single abrasive wipe with a rough cloth, a paper towel, or a household tissue can physically strip or micro-scratch these layers. The damage often does not show up immediately — it accumulates over time, gradually degrading contrast and flare resistance in ways that are impossible to reverse without re-coating the element (an expensive professional service, if available at all).
The Tools That Are Actually Safe to Use
The photography and optics community has converged on a short list of tools that can be used on lens glass without risk of scratching. Anything outside this list should be treated with serious skepticism.
1. Air Blowers (Not Canned Air)
A manual rubber air blower (also called a bulb blower or rocket blower) is always the first tool to reach for. It removes loose dust and particles without any contact whatsoever. Crucially, you should avoid canned compressed air — the propellant can leave chemical residue on glass, and the pressure can drive particles into tight crevings or damage internal aperture blades if pointed at the wrong angle.
2. Lens Brushes
A soft camel hair or high-quality synthetic brush (often sold as part of a camera lens cleaning kit) can sweep away particles that a blower misses. The key is that the brush must be kept clean — oils from your fingers contaminate the bristles and transfer directly to the glass. Always store your lens brush in a case and never touch the bristles with bare hands.
3. Lint-Free Cleaning Pads or Optical Tissues
For dry wiping, purpose-made optical cleaning pads or lens tissues are the safest contact option. These are manufactured to extremely fine tolerances specifically to avoid scratching optical glass. They are single-use, which eliminates cross-contamination from embedded grit — a major advantage over reusable cloths in field conditions.
4. Lens Cleaning Solution
For wet cleaning, the only appropriate solutions are those formulated specifically for optical coatings — typically isopropyl alcohol at 99% concentration or dedicated optical cleaning fluid. Never use glass cleaner (the ammonia in products like Windex destroys AR coatings almost immediately), window spray, saliva, or water from a tap (mineral content leaves deposits).
Can You Use a Microfiber Cloth on a Camera Lens?
This is one of the most common questions in photography forums, and the answer is nuanced. Can you use a microfiber cloth on a camera lens? Yes — but only under specific conditions, and with significant caveats.
A clean, high-quality microfiber cloth designed for optics (not eyeglasses or screens) is safe when it is genuinely clean and used correctly. The problems arise quickly in practice:
- Microfiber cloths accumulate grit and dust particles in their fibers with use. A cloth that looks clean to the eye may be carrying silica or metal particles capable of scratching a lens coating.
- Most photographers keep a microfiber cloth loose in a bag — exactly where it picks up debris.
- Laundering microfiber cloths with fabric softener destroys their cleaning properties and can leave residue on optical surfaces.
- Circular scrubbing motions with microfiber concentrate pressure on a single point, increasing scratch risk.
The professional consensus: use a fresh optical pad or lens tissue for contact cleaning, and reserve the microfiber cloth only if it has been stored sealed and has seen minimal prior use. When in doubt, reach for a single-use option.
The Correct Cleaning Workflow: Dry First, Wet Only If Necessary
The best way to clean a camera lens without scratching follows a strict hierarchy. Most photographers over-clean — jumping straight to wet solutions when dry methods would have been sufficient. Wet cleaning introduces risk (solution streaks, residue, moisture near lens seals) that should only be accepted when genuinely necessary.
Step 1: Assess Before You Touch Anything
Hold the lens up to a light source at an oblique angle. Identify exactly what you are dealing with: loose dust particles, a smudge, an oil fingerprint, or something more serious like dried water spots. Each contamination type calls for a different approach, and touching the lens before you know what is on it risks grinding particles into the coating.
Step 2: Air Blast First — Always
Use your manual blower to remove all loose particles before any contact. Hold the lens element facing slightly downward so dislodged particles fall away from the glass rather than settling back onto it. Do this two or three times. You will be surprised how often this is all that is needed.
Step 3: Dry Wipe for Light Contamination
If light dust or a faint smudge remains after blowing, use a fresh optical cleaning pad in a single outward stroke from the center of the lens to the edge. Never use a circular scrubbing motion — this moves contamination around rather than removing it, and concentrates friction. Use one pad per stroke, then discard it and use a fresh one for the next pass. This may feel wasteful, but optical pads are inexpensive, and a scratched front element is not.
Step 4: Wet Clean for Fingerprints and Oils
This is where removing fingerprints from a camera lens safely requires the most care. Apply one or two drops of optical cleaning solution to a fresh cleaning pad — never directly onto the lens, as excess fluid can wick under the front element group and reach internal optics. Use the same center-to-edge stroke technique. The goal is to dissolve the oil and carry it off the glass in a single motion, not to emulsify and spread it.
Follow immediately with a second dry pad using the same technique to remove any solution residue. Check under the oblique light again before declaring success.
Step 5: Stubborn Spots and Water Marks
Dried water spots from rain or sea spray are among the trickiest contamination to remove safely. The mineral deposits bond to the glass surface and resist a single wet pass. For these, apply solution to a pad and let it sit on the spot for 15–20 seconds before the wipe stroke, which allows the solution to dissolve the mineral bond. Repeat as needed. Do not increase pressure — patience and chemistry, not force, is the correct approach here.
Lens Cleaning Without Chemicals: When Is It Appropriate?
Many photographers prefer lens cleaning without chemicals whenever possible, especially in the field where managing small bottles creates its own complications. Dry cleaning methods are entirely appropriate for:
- Dust and airborne particle removal (always use blower first)
- Light smudges that have not bonded to the coating
- Between-shot maintenance during a shoot
- Rear lens elements, which are typically uncoated or more lightly coated than front elements
Chemical cleaning is appropriate only for: fingerprints, oily smudges, stubborn dried spots, or contamination that dry methods have not resolved after two or three passes. The principle is minimum necessary intervention — every wet cleaning session is a small mechanical event on a delicate optical surface, and keeping those events infrequent is a sound long-term strategy.
Special Considerations for Different Lens Types
Not all lenses are cleaned identically. A few important differences:
Rear elements are more protected but harder to reach. They tend to accumulate less contamination, but when they do get dirty, the impact on image quality is proportionally greater because light passes through them at a more concentrated beam. Use the same protocol but be more conservative — rear element smudges are less common and usually require wet cleaning when they do occur.
Vintage and legacy glass often lacks modern fluorine coatings and uses older AR formulations that are significantly more fragile. Be more conservative with solutions on older glass — stick to dry methods unless absolutely necessary, and when wet cleaning is required, use less solution with lighter pressure than you would on a modern lens.
Cinema and video lenses often have markings printed or engraved on the barrel that can be damaged by solvents. Keep cleaning solution away from the barrel entirely and focus it precisely on the optical element.
Ultra-wide and fisheye lenses have highly convex front elements that make center-to-edge strokes awkward. Work in short radial strokes from the center outward, rotating the cleaning pad position with each pass.
What Never to Use on a Camera Lens
Some items get used on lenses out of desperation or misunderstanding that cause real, permanent damage. These should be avoided categorically:
- Paper towels or tissues — wood-fiber paper products are abrasive under magnification and will micro-scratch coatings
- Shirt fabric or clothing — even soft cotton traps grit particles from the environment and has no optical cleaning properties
- Household glass cleaners (Windex, similar) — ammonia-based formulas attack AR coatings rapidly and irreversibly
- Canned compressed air — propellant residue and uncontrolled pressure make this inappropriate for optical surfaces
- Breath condensation ("huffing") — the acidic compounds in breath leave a residue that bonds to coatings over time and is harder to remove than the original smudge
- Saliva — biological contamination with no place on precision optics
- Rubbing alcohol below 90% concentration — water content at lower concentrations leaves mineral deposits and can damage seals
Storage Habits That Reduce How Often You Need to Clean
The best cleaning strategy is one you rarely need to execute. Photographers who keep their lenses consistently clean share a few common habits that dramatically reduce contamination frequency:
Always cap both ends of the lens when not shooting. Front and rear caps take two seconds to put on and prevent the majority of dust and fingerprint contamination. Many photographers who complain about dirty lenses have simply gotten casual about capping.
Use a UV or clear protective filter on the front element. This is a genuinely debated topic — some photographers argue it adds an optical surface that can cause flare, while others note that cleaning a relatively cheap filter repeatedly is preferable to cleaning (and risking) an expensive front element. A high-quality multi-coated UV filter from a reputable brand adds negligible optical impact and gives you a sacrificial front surface.
Store lenses in sealed bags or cases in your bag. The interior of a camera bag accumulates dust, lint, and debris. Keeping lenses in individual pouches dramatically reduces how much of that debris reaches the glass.
Avoid lens changes in windy or dusty environments. This sounds obvious, but many photographers change lenses habitually in environments where the exposure time to airborne particles is brief. When possible, turn your back to the wind, work quickly, and keep caps on as long as possible during the swap.
Check and clean your camera sensor regularly. A dusty sensor does not directly dirty the lens, but it encourages more frequent body-open lens changes, which increases exposure of rear elements to the environment. A clean sensor means fewer emergency sensor-cleaning sessions and calmer lens swaps.
Building a Camera Lens Cleaning Kit for the Field
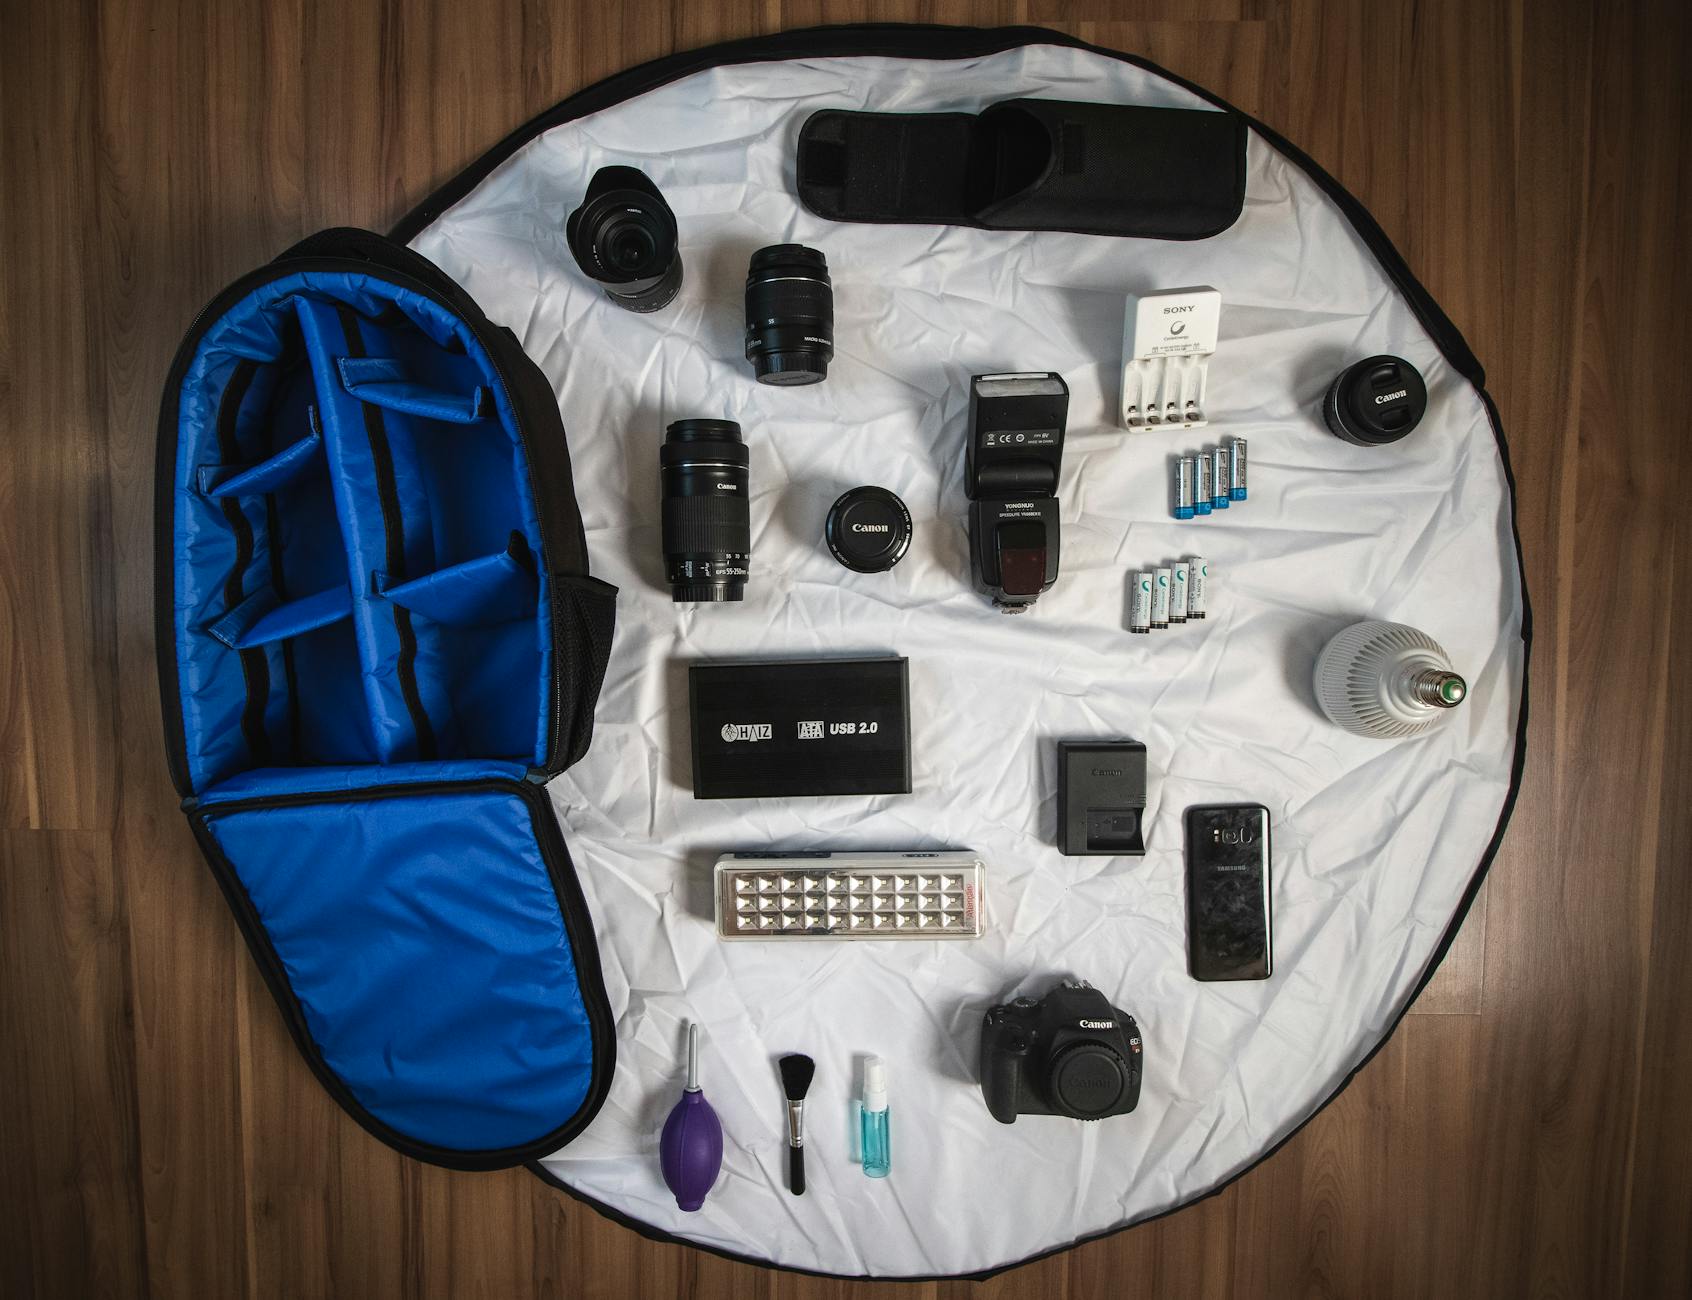
A practical camera lens cleaning kit does not need to be elaborate. For most photographers, the essentials are:
- A compact manual air blower (a small Giottos Rocket or similar fits in most bags)
- A retractable lens brush stored in its cap
- A travel-size sleeve of individually wrapped optical cleaning pads
- A small bottle of optical cleaning solution (5ml or 10ml is sufficient for a full day of field use)
The entire kit fits in a small pouch that takes up minimal space in any camera bag. Individually wrapped pads are particularly useful for field conditions because each pad is uncontaminated at the point of use, removing the single biggest variable in safe lens cleaning — whether your wiping surface itself is clean.
Some photographers also carry dry lens cleaning pads that have a slight tackiness designed to lift oil-based contamination without liquid, which works well for light fingerprint smudges in conditions where pulling out a bottle is impractical. These are a solid middle-ground option between dry tissue and full wet cleaning.
Key Takeaways
Cleaning a camera lens safely comes down to a small number of principles applied consistently:
- Always blow loose particles off first — contact cleaning over grit is what causes scratches
- Use dry methods before wet — minimum intervention protects coatings over the long term
- Single-use optical pads eliminate the contamination variable that makes reusable cloths risky
- Strokes from center to edge, never circular scrubbing, move contamination off the glass
- Never apply solution directly to the lens — apply to the pad, then to the glass
- Storage habits are your best defense — cap every lens the moment it leaves the camera
- When in doubt, do less — a small smudge in a corner affects almost no images; an aggressive cleaning session gone wrong affects every image you take
Lens glass is robust enough to last a photographer's entire career when treated with reasonable care. The photographers who keep their glass in the best condition are not the ones who clean most often — they are the ones who clean most carefully, with the right tools, in the right sequence, and only when genuinely necessary.